
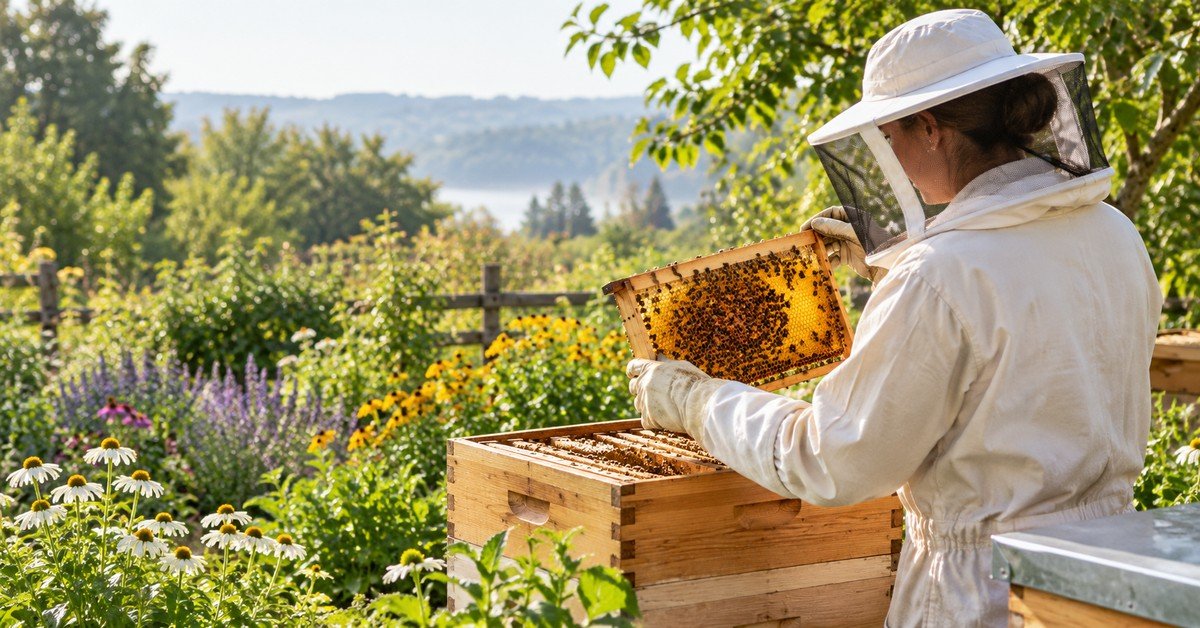
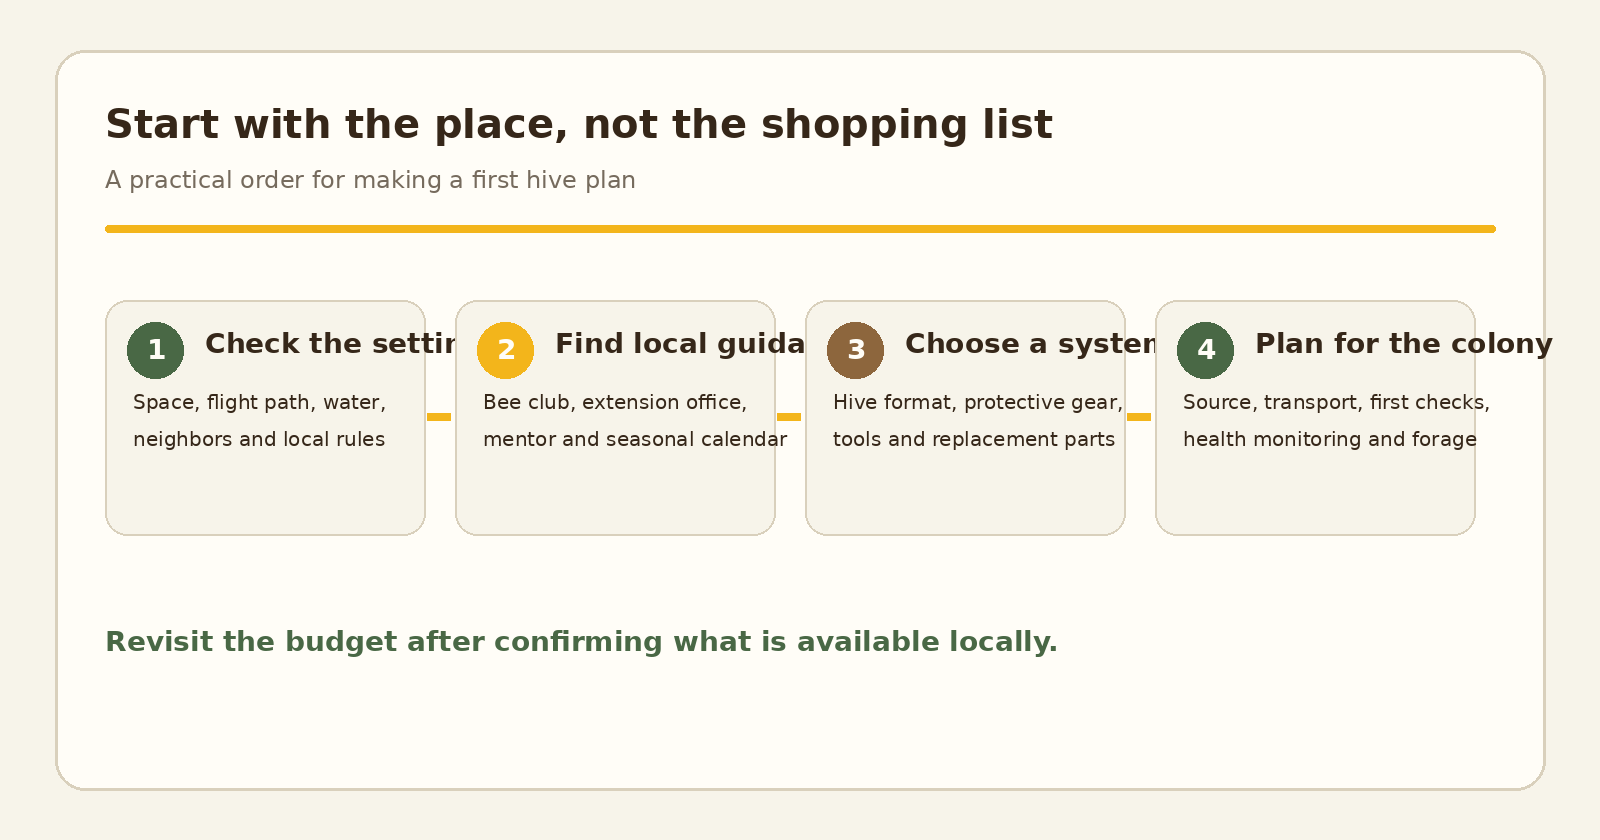
How to start beekeeping is a question about a place, a living colony, and the support available when an observation is hard to interpret. Equipment comes later. Find a local mentor, check the site, and learn the seasonal pattern first. These steps give you a better basis for choosing equipment and bringing bees home.
This guide is for someone considering a first managed honey bee colony. It explains the decisions that should come before a purchase, how to build a realistic first-year plan, and which uncertainties need local advice. It does not assume a particular climate or promise a honey crop.
Jump to a specific section on this article
Contents
How to start beekeeping: what to decide before buying bees
Write down why you want to keep bees. The answer changes the scale of the plan. A garden pollination goal, a teaching apiary, honey production, queen rearing and a small commercial operation have different demands. A first colony bought to learn is a different project from equipment purchased to produce a particular volume of honey. Your first objective should be healthy, competently managed colonies, with harvest treated as a possible result rather than a guarantee.
Choose a starting scale that you can inspect, record and get help with. One hive can be less expensive and easier to house, but a single colony gives you no second colony for comparison. Two colonies cost more in bees and equipment, yet can help a mentor compare brood patterns, stores or growth when a question arises. More colonies also mean more inspections, records and health-management decisions. There is no universal number that is right for every beginner.
Before paying a deposit, write down four answers. What is your goal? How many colonies can you manage? Who can inspect with you? Which local rules apply? If one answer is unknown, identify how you will find it. An unknown is a research task, not a reason to order a larger starter kit.
It helps to separate the purchase into stages. First secure a suitable location and mentoring. Then choose a hive format and confirm that compatible bees and replacement parts are available. Buy the protective equipment and the parts needed for the first installation. Add harvest equipment only when you know whether you will harvest, how much you expect, and whether you can borrow or share a food-safe extractor.
Does your site support a managed honey bee colony?
Visit the proposed apiary at different times of day. Notice where people, livestock, pets and vehicles move. Watch the bees and other pollinators already using the area. Look for reliable water, forage across the year, drainage, access for carrying equipment, and a safe route for moving around the hive. A place that looks calm at noon may be a busy path at dusk. A short visit in one season cannot show how the whole year behaves.
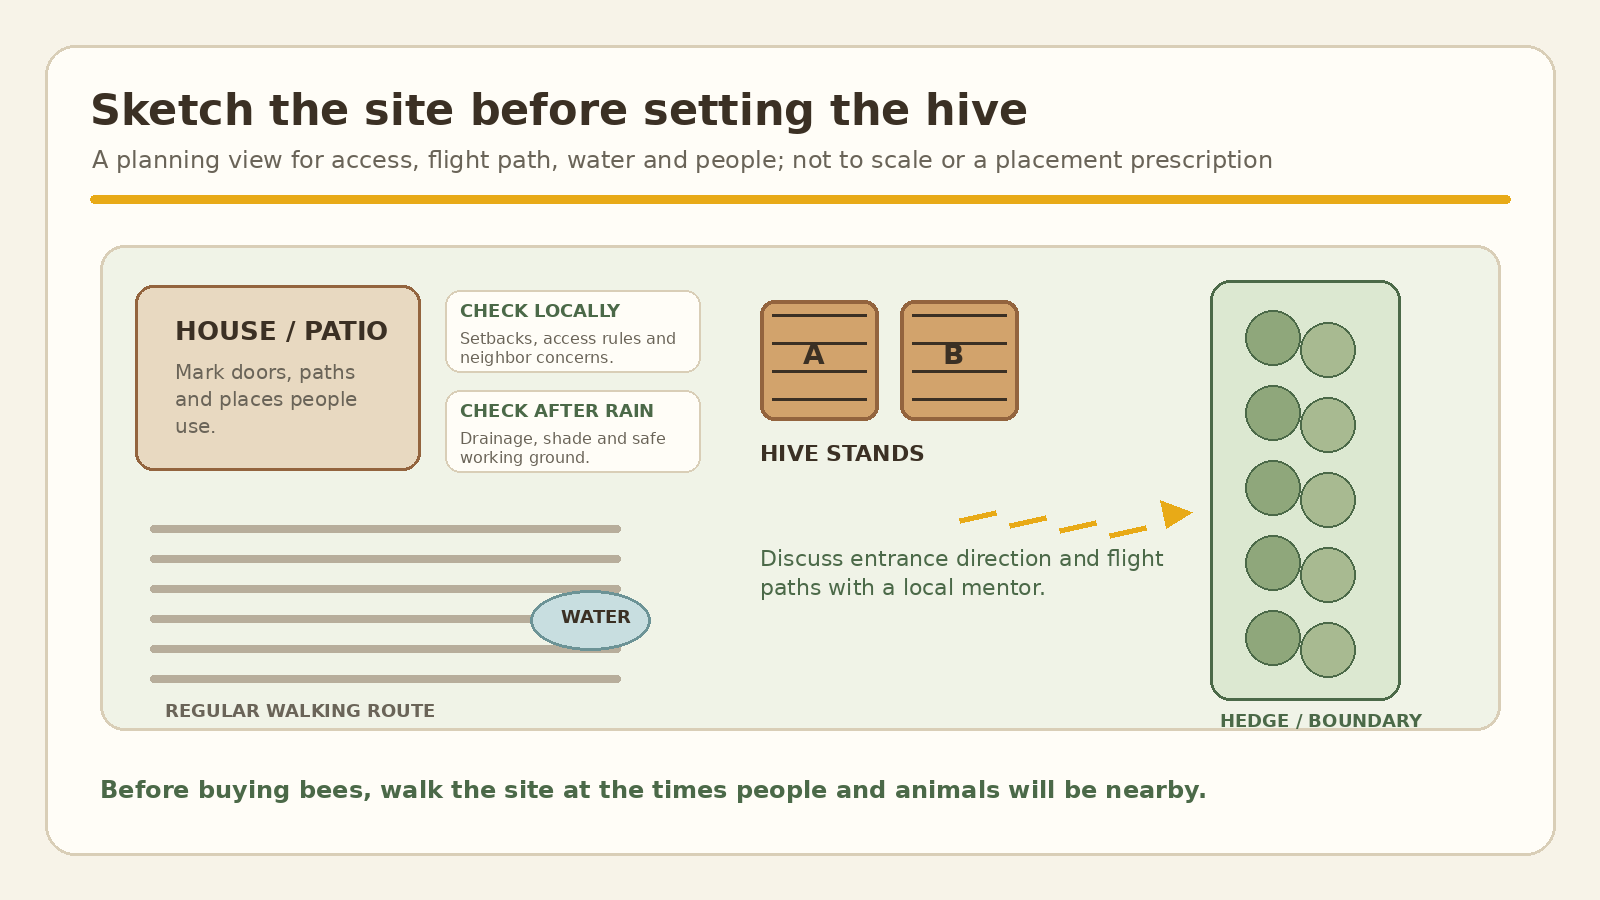
Think about the flight path, meaning the direction bees commonly use as they leave and return to the entrance. A hive beside a doorway or narrow walkway may send flight traffic into the same space people need to use. Natural barriers and thoughtful placement can help direct movement, but the right arrangement depends on the site and local guidance. Do not rely on a generic distance rule from another country or municipality.
Forage is more than a flowering patch visible from the hive. Bees may forage beyond the property boundary, and available nectar and pollen change as plants flower, weather shifts or land is managed.
Ask nearby beekeepers when forage is usually abundant or scarce. Find out how drought or rain changes it and whether colonies need extra feed locally. The answer should reflect the local landscape, not a month-by-month calendar copied from another climate.
Also consider practical access. Can you reach the hive after rain? Is the stand stable and high enough to keep the hive dry and manageable? Can you lift a full box safely, or will your chosen hive format allow smaller loads? Where will spare boxes, frames, protective clothing and a smoker be stored? How will you move a colony if the site becomes unsuitable? A site plan that ignores carrying and storage often creates avoidable strain once the colony is active.
Which local rules and neighbour concerns should you check?
Ask the relevant municipal, agricultural or animal-health office whether apiary registration, inspection, zoning, hive limits or disease reporting apply. Rules can change by jurisdiction. A beekeeper should know how to contact the responsible inspector or extension office before a suspected disease, swarm or neighbour complaint occurs. If the property is rented, shared or part of a managed building, obtain permission from the person or organization responsible for it.
Speak with the people who use nearby outdoor spaces. Explain where the hive might go, what flight direction you are considering, and how you will keep the water source reliable. Ask whether anyone has a serious allergy or whether children, pets or workers regularly pass close to the intended area. The goal is not to promise that bees never sting. It is to identify exposure and prevent avoidable conflict before the hive arrives.
Be specific about the site boundary and responsibility. If an apiary is on a farm, clarify who opens gates, operates equipment nearby, maintains vegetation and contacts you about a swarm. If the colony is on another person’s land, agree on access in writing. A good relationship starts with clear expectations about visits and emergency contact, not with an assumption that the landowner will understand beekeeping routines.
Read Penn State Extension’s guide to beekeeping and honey bees for an overview of beginner considerations. Then check local rules, disease procedures, and seasonal timing with the authority for your area. That distinction matters because a sound general practice can still be mistimed or restricted by local conditions.
How do you find a mentor who can help with the first inspections?
Join a local beekeeping association or ask an extension service, agricultural college, community apiary or experienced beekeeper where beginners can learn. A useful mentor explains what supports an interpretation and shows safe handling.
They should also tell you when to contact an inspector or specialist. A confident answer without a reason is less useful than a careful answer that identifies what remains uncertain.
Before committing, ask whether the group offers a beginner course, apiary demonstrations, a buddy for the first inspections, or a way to borrow specialized equipment. Find out whether instruction covers recordkeeping, pest monitoring, disease reporting and local seasonal management, not only assembling boxes or harvesting honey. You want help that continues after the bees arrive.
Ask how and when to contact the mentor. Can you send a clear photograph of a frame? Are there set apiary days? Is the mentor available only during a course? Do they keep the same hive type you plan to use? Does the local association have a process for urgent disease concerns? These practical details affect whether advice can reach you when the colony needs a timely decision.
Build your own observation skill alongside the mentor relationship. Before an inspection, write down the question you want to answer. Afterward, record what you saw and what you did. Ask the mentor to distinguish an observation from an interpretation. For instance, “I did not see the queen” is an observation. “The colony is queenless” is a diagnosis that needs additional evidence. That habit helps a new keeper avoid turning a single missed sighting into an unnecessary intervention.
Which bees and hive system should a beginner choose?
Choose a hive system that local suppliers and mentors can support. Hive names, dimensions, frame styles and materials are not interchangeable. Frames that do not fit the box can make inspection harder and can damage comb. If your mentor uses one format and your supplier sells another, ask about the compatibility before buying either one.
New colonies are commonly offered as packages or nucleus colonies, often called nucs. A package typically supplies bees and a queen without the established brood comb of a nuc. A nuc generally includes a small functioning colony on frames, but what is included varies by seller and region. Confirm the queen’s status and the bees’ health and origin. Ask what equipment you must provide and when you can collect the colony. Arrange for a knowledgeable person to help inspect the purchase where local services allow it.
Ask suppliers how they handle disease prevention, queen replacement, transport, and local adaptation. Request clear information about the hive format and frame measurements.
Avoid buying used comb or equipment simply because it is cheap; used material can carry pests or pathogens. Follow local inspection and sanitation guidance, especially if the origin is uncertain.
Do not choose bees by a broad promise of gentleness, honey yield or low maintenance. Colony behavior can be affected by genetics, handling, season, weather, forage and health. A seller’s general description does not guarantee how an individual colony will behave at your site. Ask a local mentor what stock is commonly kept and how they assess a colony after it is established.
What equipment is essential before the colony arrives?
Start with a compatible hive body, frames, and foundation or another local comb system. You will also need a stable stand, cover, bottom board, and secure entrance. The exact components depend on the hive style. Buy enough assembled equipment to house the colony and respond to the first expected growth phase. Do not purchase extra boxes just because a catalog bundles them together.
Personal protective equipment should fit and be usable. A veil needs to stay secure when you bend and look down. Gloves protect hands but can reduce fine control; different beekeepers work with them differently. Ask a mentor what is customary locally, then practice handling the smoker, hive tool and frame before a live inspection. Keep the smoker fuel, lighter and a safe place to extinguish it in the same kit.
Have a notebook or phone-based record system ready. Each entry can include the date, weather, entrance activity, colony strength, brood, food, pest-monitoring result, actions taken and the next question. A few consistent observations are more useful than pages of vague notes. Keep records in the same place as the equipment so a helper can understand the colony’s history.
Separate must-have equipment from eventual equipment. You may need extraction tools, bottling supplies, a wax melter, extra hive bodies, queen-marking tools, or specialized feeders later. Beginners can often borrow or share them. Confirm what a local mentor considers essential for the first season and what can wait until the colony’s condition creates a specific need.
| Equipment group | Confirm before purchase | Question to ask locally |
|---|---|---|
| Hive and frames | Exact dimensions and replacement availability | Which format do mentors and suppliers support? |
| Protective gear | Fit, visibility, movement and cleaning | What protection is recommended for beginner inspections? |
| Inspection tools | Hive tool, smoker, fuel and safe storage | Can someone show you how to use and extinguish them? |
| Feed and monitoring supplies | Locally approved methods and equipment | Which conditions trigger monitoring or feeding here? |
| Harvest equipment | Cleaning, food safety and sharing options | Can you borrow an extractor if a harvest is appropriate? |
How can you budget for the first year without guessing at prices?
Prices differ by country, supplier, material, shipping and season, so a price copied from another market is a poor budget. Request current local quotes and list recurring as well as one-time costs. Budget for bees, hive parts, protective clothing, tools, transport, stand, and weather protection. Include locally indicated feed, pest monitoring, replacement parts, training, and a reserve for unexpected needs. USDA NASS’s national bee-stock price averages compare queens, packages and nucs in the United States, but they should not replace local quotes.
Hover over a chart mark or use Tab to focus it for its value and context. All values remain labeled on the chart.
Keep the first budget in three columns: required before bees arrive, likely during the first season, and optional or shareable. The first column should contain site preparation, essential hive parts, protective equipment, basic tools and the bee purchase.
The second includes replenishment, monitoring, transport, repairs and any locally indicated feeding. The third can hold extraction and processing items that might be borrowed or hired. This makes the real first purchase visible without treating every catalog item as essential.
Ask what is included in a quote. A bee package, nuc, complete hive and starter bundle may contain different parts. Check whether frames are assembled and foundation is included. Ask about shipping, a feeder, and delivery or pickup. Compare equivalent items, not package names.
Set aside a reserve rather than spending the full budget on the initial order. A colony may need a replacement part, a second inspection, a local diagnostic visit or extra transport. The reserve is not an estimate of how often a problem will occur. It is a way to avoid being forced to choose between a necessary management action and an empty budget.
When should you order bees and prepare the apiary?
Use local bloom, weather and supplier schedules rather than a fixed month. The ideal arrival window depends on the colony form, local forage, the time available to establish comb and brood, and what your climate allows. Ask a local beekeeper when new colonies are normally installed and what needs to be ready beforehand. Then work backward from that date to finish the stand, assemble frames, check the water source, arrange transport and rehearse the installation with help.
Confirm the delivery details directly with the supplier. Find out how much notice they provide, what happens if weather delays pickup, how bees are transported, and what equipment should be ready. Identify a suitable place for a temporary package or nuc if the installation is delayed. Do not accept bees before you can house them appropriately and get advice if the colony is distressed or the weather is unsuitable.
Before arrival, walk the route from the vehicle to the stand with the hive components. Clear obstacles and make sure you can place the colony without carrying a heavy assembled box through a narrow or slippery area. Keep a written installation checklist near the equipment. A practical sequence is easier to follow than memory when bees are waiting in transport.
What should you learn to check during a first-year inspection?
Every inspection should answer a question. Ask whether the colony has room to draw comb and whether the queen is laying. Check food stores for current conditions and whether a pest-monitoring step is due. Open the hive for a reason and keep the work focused. Repeatedly pulling frames without a question can chill brood, disrupt the colony and make it harder to interpret what you see.
Learn to read the colony in context. Eggs, larvae and capped brood indicate different stages of development. A frame with brood does not by itself prove that every aspect of colony health is satisfactory.
Stores, space, population, brood pattern, pests, weather and the time of year contribute to the assessment. A missing queen sighting is not sufficient evidence that the colony has lost its queen.
Use a repeatable record format. Note which frames you checked, what you found, what changed since the previous visit, and any treatment or feeding decision. Use the local monitoring method for pests and record the method and result. If a brood pattern changes, include an image when it can be taken safely, but do not diagnose disease from a photograph alone. Contact a qualified local resource for suspected reportable disease.
Make a short plan for the next visit. Your next step might be to check stores after a local forage gap. You may need to repeat a mite test at the recommended interval or ask a mentor to review a brood pattern. A clear action can prevent repeated hive openings when an inspection has no conclusion.
What should a beginner expect from the first season?
The first season is primarily an establishment and learning period. A new colony needs to build population and comb, collect or receive appropriate food, and remain healthy through the local cycle. The colony’s development depends on its starting condition, forage, weather, equipment and management. A successful season may produce little or no harvest, especially when the colony is still growing. Avoid making honey yield the only measure of progress.
Expect decisions to come in bursts. Several routine weeks may be followed by a period when colony growth, swarm preparation, a forage change or a health concern requires more attention. Make time for setup, travel, inspection, cleanup, recordkeeping, learning and follow-up, not only the minutes spent lifting a lid.
Some work is physical. Boxes and honey-filled frames can be heavy, and lifting technique matters. Think about whether you need smaller hive components, a second person, a level surface or a safer route. Never assume that a standard box weight or hive arrangement will suit your body or site.
Set a realistic first-year goal: know whom to contact, recognize normal variation, and keep accurate records. Follow local monitoring and legal rules, and ask for help when evidence is unclear. That is a substantial accomplishment. The article on what to expect during a first beekeeping season explains how local cues shape that learning year.
How can you check a bee supplier before paying?
Ask the supplier to identify the colony type, hive dimensions, pickup period and what is included. If you are buying a nuc, ask how many frames it contains and whether those frames fit the hive format you intend to use.
If you are buying a package, ask how the queen is introduced and what follow-up the seller recommends. The answers should be specific enough for you to prepare compatible equipment.
Ask how the bees were produced or sourced and what health records are available. A supplier cannot guarantee future colony performance. They should explain its current condition, queen status, and any known transport or inspection issue. If used equipment or comb is included, ask about inspection and disease history. Do not treat a low price as compensation for unknown provenance.
Clarify the terms of pickup. Will the seller provide a collection window or exact time? What should you bring? What happens if weather delays transport? How long can the colony remain in its shipping container? Where can you get help if the queen is not released or the package appears distressed? Keep the answers in writing so you can refer to them when the bees arrive.
Compare suppliers on more than price. A nearby supplier who works in the same region may understand local timing and be easier to contact. A distant seller might offer a colony type not locally available, but transport and follow-up then need more planning. Ask a mentor to review the offer before you commit, especially if you cannot confirm the hive format or health information.
How should you plan for colony growth after installation?
Plan equipment in stages. The colony needs a suitable home at arrival and enough compatible parts for the next likely growth stage. Ask a mentor how they decide when to add space in your hive system. A fixed number of days or a full stack of boxes purchased at the outset may not match the colony’s strength or local flow.
Keep a small reserve of compatible frames and essential repair parts. This is different from buying every optional tool. A spare cover or frame may be useful when equipment is damaged, while an extractor may be borrowed if the colony produces a harvestable surplus. Your local association can tell you whether sharing equipment is common and what sanitation practices apply.
Work out what you will do if the colony grows faster than expected or does not grow as expected. If it grows quickly, who can help assess space and swarm signs?
If it remains small, who can review food, brood and health? The same mentor may help with both, but the questions and interventions differ. Include the contact route in your notes before purchase.
First-year plans should also identify what success means. If your aim is learning, success may be a well-documented installation, confident frame handling and a reliable monitoring routine. If your aim is honey, the colony still needs to retain adequate stores and establish itself before any surplus is removed. The explanation of what beekeeping includes beyond harvesting honey is a useful reset when shopping lists begin to dominate the plan.
What contingencies belong in a first-apiary plan?
Plan for weather delays, a supplier cancellation, damaged equipment, or an unavailable mentor. Include a response for colony concerns between routine visits. You do not need a detailed emergency manual for every possibility. You do need names, phone numbers and a few decision rules that help you reach the right person quickly.
Write a contact sequence. The supplier can answer questions about what they provided. A local association mentor can explain ordinary inspection signs. A bee inspector or extension service can handle suspected disease and regional rules. An emergency service may be relevant if a hive creates an immediate public hazard. Different questions require different expertise.
Decide how a backup keeper would access the site and records. If you cannot visit during a busy period, tell the helper where the hive is and which colony is yours. Give your contact details and a clear task. Avoid vague instructions such as “take care of the hive.” Say whether the helper should observe the entrance, call you, or do a task they have learned.
Contingencies should include your own limits. If equipment is too heavy, plan a second person or a different format. If stings or heat present a personal health concern, ask a clinician about your situation and choose protective measures with local guidance. If the site is inaccessible after rain, decide how an inspection will be delayed or covered. A plan that names a constraint can be improved; one that ignores it cannot.
The guide to the specific difficulties new beekeepers face can help you test the plan against time, physical demands and uncertainty. Once the hive is in place, the management sequence from installation through harvest explains which later decisions are linked to colony development.
FAQs: What questions do people ask before starting beekeeping?
How many hives should a beginner start with?
Choose a number you can house, inspect and get help with. One colony lowers the initial equipment cost; two colonies give you a comparison when a mentor helps interpret differences. The right choice depends on budget, site, local practice and time, rather than a universal beginner rule.
Can I keep honey bees in a small garden?
Possibly, but property size alone does not answer the question. Check local rules, flight paths, water, forage, neighbor activity and safe access. Ask a local association or inspector to review the specific site before ordering bees.
Do I need to see the queen during every inspection?
No. Eggs and a suitable brood pattern can show that the queen has been laying. Finding her may be useful for a particular task, but searching for her on every visit can add time and disturb the colony.
Will I harvest honey in the first year?
There is no reliable promise. A new colony may need its resources for comb, brood and food stores. Follow local guidance on what the colony should retain, and consider any harvest a bonus only after colony needs are met.
Are you ready to start beekeeping this season?
Start this season only when you have a suitable site, checked permission and local rules, compatible equipment, and a reliable bee source. Arrange support for your first inspections. If any of those pieces is missing, use the time to resolve it before buying. Once the foundation is in place, choose a modest starting scale and set up the colony to learn its local pattern. For anyone wondering how to start beekeeping, that preparation is the soundest first step toward caring for bees well.